Setting Up mIRC and Getting Colours
This is from Prof. Maya Winter's IRCguide, with her permission and blessing.
Contents
Installing mIRC
Please ignore anything mIRC says about you needing to pay for it - you get a free trial first any way and it should be possible for you to continue using it forever more without paying anyway >> Just wait until the "Continue" button becomes clickable *nod* If after a while only the "exit" button is clickable, use CGI or Mibbit or something to get onto IRC and ask for help :)
First you need to head along to http://www.mirc.com/get.html and click the "Download mIRC" button. Make sure you know where the file's saving to! It tends to be the desktop. After that, find the newly downloaded file which will be called something like mirc635.exe (the numbers may vary depending on the version you're downloading).
Some of your pictures might look slightly different to the ones below but I've used the most recent mIRC (as of 22nd July 2009) so hopefully it's not too far off.
1. Double-click / run the .exe file that you just downloaded and you'll be taken to a screen like this:
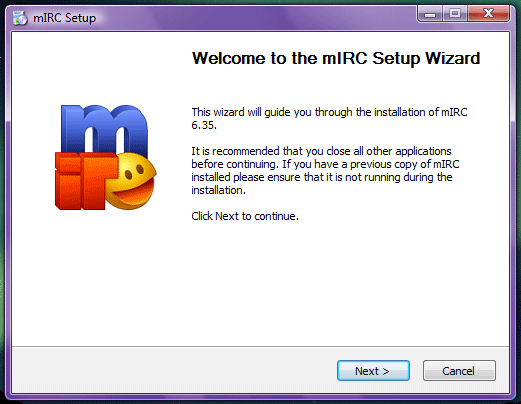
Click next to be taken to the License Agreement (mirc02.png) and click "I Agree".
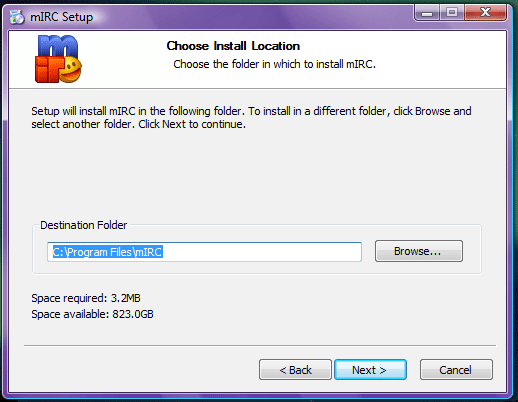
Next you'll be allowed to choose where you want to install mIRC on your computer; if you don't care, the default of C:\Program Files\mIRC should be fine (as seen here: mirc03.png).
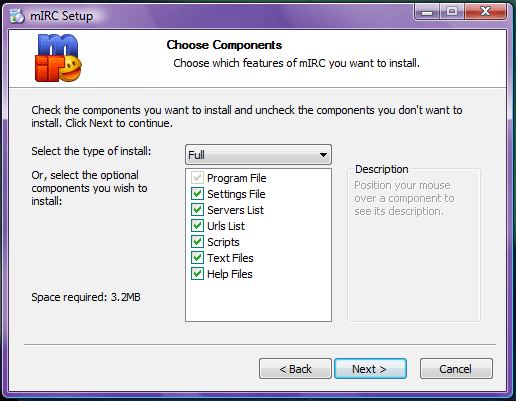
Then comes choosing which components you wish to install; however, unless you know what you're doing (in which case you probably aren't reading this) you should just click "Next" and stick with the default full installation (seen here: mirc04.png).
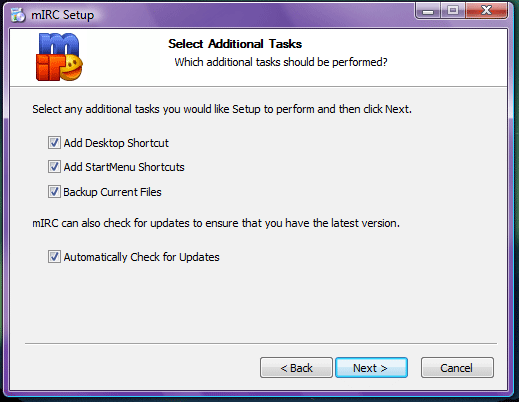
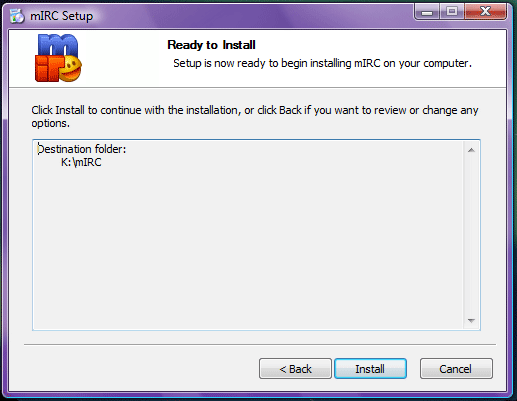
- This is the easy bit where you just decide whether you want a desktop icon added, etc. (as per mirc05.png) and then click "Next". It is quite possible you don't want it to automatically check for updates though, depends on you, I definitely prefer for it not to do that. >_> Finally you just hit a summary screen telling you where it's going to install the program (mirc06.png) and click "Install".
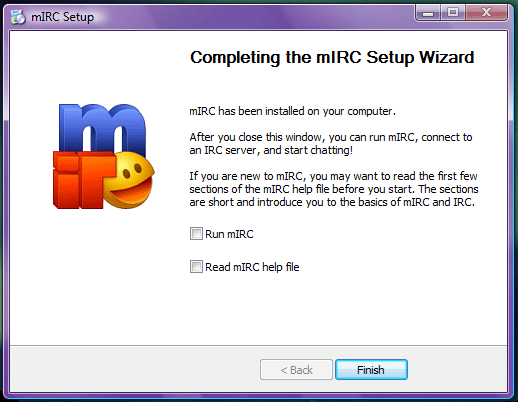
Your installation should now be complete and you should see the below image! If you want to start mIRC straight away you'll probably want to check the "Run mIRC" button ^^
Setting up mIRC
When you open up mIRC I think you'll get to see the following screen first. Although the time you have remaining for the evaluation copy will probably be a bit longer to start *nod* Just click continue. I'll say it again, you should never need to pay for mIRC so ignore anything that seems to be asking for money.

- The next screen you should see is seen here: mirc09.png. If this screen doesn't open for you either hit "Alt+o" or click on the Tools menu at the top of the screen and select "Options".
- For "Full Name" you can just put in your first or full HOL name
- For "Email Address" you can put anything - it can be a fake / non existant e-mail as it means nothing really XD
- For "Nickname" you put whatever nick you want to chat with. However for new HOLers we recommend your HOL name is used to start, so for example, as my name's "Maya Winters" if I was new I'd probably put a nickname of "Maya" and in "Alternative" I'd put something like "MayaW" in case my first choice was taken.
Before you can connect to the chatrooms you need to make sure you're connecting to the Blitzed IRC server. You do this by clicking on where it says "Servers" in the left-hand side of the box from the previous bullet point, as shown below!
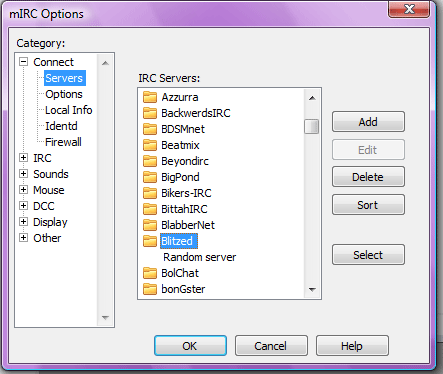
If you scroll down the list under "IRC Servers:" on the right you should find a folder called "Blitzed" as seen above. Double-click it so you can see the thing saying "Random server" underneath it, then click where it says "Random server" and then hit the "Select" button on the right. When you hit select you *should* be taken back to the screen from bullet point 2, just above. If you've gotten this far move onto the next bullet point now (ignoring the rest of this bullet point.)
If you can't find a folder called "Blitzed" on the right you'll need to add it yourself. You do that by clicking the "Add" button seen on the right above. Clicking the "Add" button brings up the screen below. You can put whatever you want in the "Description" box but calling it Blitzed seems to make sense. In the IRC server box you need to put exactly what I did "irc.blitzed.org" and then you click "Add". Ignore all the things about Ports and Groups and Passwords *nod* Once you click "Add" you should then be able to find your new "Blitzed" bit in the list, and select it :D

You should now have a screen similar to this:
I.e. telling you it's going to connect to "Blitzed: Random server" or irc.blitzed.org or something similar. If so hit "Connect" (and your main mIRC screen should then look something like this: mirc14.png - although yours might not say sausage.tx.us.... but something slightly different XD) As long as it says blitzed.org somewhere on there things are going okay! Now you need to wait until it connects - you may need to tell your anti-virus software that yes, you know it's trying to connect to the internet. It can connect more or less instantaneously for some people but for others it may take 20-30 seconds or so, just be patient!
Once it connects, the following screen might pop up:
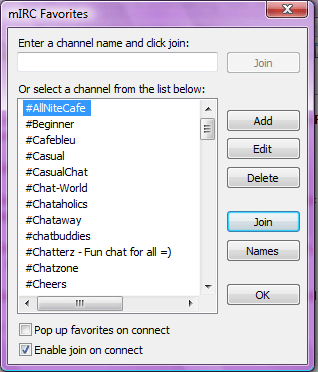
If it does, I'd suggest you probably want to deselect the "Pop up favourites on connect" button and then click the X at the top right of the window >> What you really want to do the first time you connect to IRC is shown in the below window:

After typing /join #hol and hitting enter you should be transported into the wonderful world of the HOL chatrooms and any further questions / fiddling you want to do with your mIRC you can probably get help for there. If you want help with colours however, just keep reading this page!
Colours on mIRC
To get colours on mIRC you need to put a code into the "Remote" tab of the Scripts Editor.
First things first, you find the Scripts Editor in one of the following ways:
- You click the Scripts Editor button circled in SHINY!PINK below.
- You hit "Alt+r"
- You click the "Tools" menu and then select "Scripts Editor"

The Scripts Editor should look like the image below. Note that the "Remote" tab is selected along the top, this is very important!

In the huge white text box you need to paste the following snippet of code (part of which is seen in the image above)
on *:input:*:{ if ($left($1,1) != /) { /say $chr(3) $+ colourshere $+ $1- | halt } }
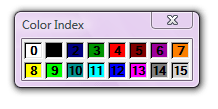
However you need to pick the colours you want to use before you put the above code in or it won't work! The colours available with mIRC are given below and can be seen on the mIRC screen by hitting "Ctrl+k".
So for example if I wanted to have colours like this, then my colour remote code would be as below:
on *:input:*:{ if ($left($1,1) != /) { /say $chr(3) $+ 00,12 $+ $1- | halt } }
The 00,12 bit represents the colours. The first number 00, is the white text and the second number, the 12, represents the blue background colour.
It's very important that all numbers you put into the code are two-digits each! I.e. white is represented by 00 NOT 0 and red is given by 04 NOT 4 — if you use single digits the code can get messed up.
Anyway, once you've selected the colours you want and pasted the code into the remote tab, you should be good to go — click "OK" and start typing in colour \o/
(If you want "enders" on your colours, I do intend on adding something about them to this site eventually so just bug me about it maybe, but nicely! XD)
Oh and please note:
- Your colours should be legible and not keel peoples' eyes, otherwise you're likely to just get complaints. The white on blue I showed above would be fine for example, whereas: these colours ladedaaaa probably wouldn't be >_> Ouch, right? XD
- People do tend to get rather protective over colours they've used for a long time. Whilst no one "owns" colours, I'd recommend adding enders or something to your colours to help people distinguish you from the other person. That and using the same colours as someone who talks a LOTLOT just gets really confusing anyway.
Hope this helped :D
Enders on mIRC
Before you learn how to do this I'd like to just emphasize a couple of points:
- Enders are more complicated than normal colours to set up.
- I'm assuming you've already read the colours bit — get that to work first then worry about enders!
- The maximum character length for ender is 3 characters long — including any blank spaces.
- As with the colours, the enders shouldn't be obnoxious and should be tasteful.
- When trying to choose your enders, please do so in a private channel.
Moving on to the actual bit — if any of you don't know what enders are, they're this:

The enders in the image are the ||| lines in different colours and are of the maximum 3 character length permissible. Now onto the IRC code, the code given below is the one to give the enders illustrated above ^^
on *:input:*:{ if ($left($1,1) != /) { /say $chr(3) $+ 11,01|13,01|06,01|15,01 $1- 06,01|13,01|11,01| | halt } }

Now while both of these are copied and pasted from the same file you may have noticed that the little symbol before the colour code is missing in the text version:

This is the symbol created by pressing "Ctrl" + "k" in mIRC and it MUST be placed before EVERY colour-code combination (eg 11,01 etc) in the code.
So the list of how to insert the colour code into your IRC and get your own enders:
- Open the Scripts Editors in the remote tab (read the previous section on colours if you don't know how to do this)
- Copy and paste: on *:input:*:{ if ($left($1,1) != /) { /say $chr(3) $+ ..11,01|.13,01|.06,01|.15,01 $1- .06,01|.13,01|.11,01| | halt } }
- Next, go along and "ctrl+k" in front of each set of 4 numbers so that your code looks like the one in the remote.ini above.
- Now you can edit your enders:
- Change the colours by editing each set of numbers "00,00"
- Change the characters by changing the | for whatever symbol you wish
- If you want a blank square of colour with no text on it, simply insert a space
- There's no reason enders -have- to be symmetrical but it looks prettier
If you don't want to have 3 different colours, just delete bits as necessary... for example for

you would need to edit the code to look like this:
